

When it comes to capturing video of high quality, low-light conditions can be a significant obstacle. Low-light conditions can cause footage to be grainy or blurry, regardless of whether it is shot indoors or outdoors.
However, even in low-light conditions, you can improve the quality of your footage and obtain clear, sharp images with the right video enhancer software. In this blog post, we’ll talk about using video enhancer software to improve images in low light.
Understanding Low-Light Conditions and Image Enhancement
Low-light conditions occur when there is lacking lighting in the environment, bringing about dim or shadowy regions in the picture. Image enhancement involves the use of software to improve the quality of an image. In order to improve the clarity and sharpness of an image in low-light conditions, image enhancement involves brightening it, increasing contrast, and decreasing noise.
Benefits of Using Video Enhancer Software to Improve Images in Low-Light Conditions
Several advantages of using video enhancer software to improve images in low-light conditions exist. First and foremost, it can assist in brightening and clarifying the image, reducing the requirement for additional lighting equipment.
Also, it may assist in reducing noise and blur, resulting in images that are sharper and more clearly defined.
Video enhancer software can, however, contribute to the enhancement of the image’s overall quality, making it appear more polished and professional.
How to Use Video Enhancer Software for Enhancing Images in Low-Light Conditions
 Step 1: Select the Low-Light footage
The most vital phase in using video enhancing software for upgrading pictures in low-light circumstances is to choose the recording you wish to improve. Guarantee that the recording is in an excellent condition that can be altered and upgraded using the software.
Step 2: Upload the Footage to the Software
After selecting the footage, the next step is to upload it to the software for video enhancement. The majority of software will let you select the file by dragging it into the interface or by using the software’s import function.
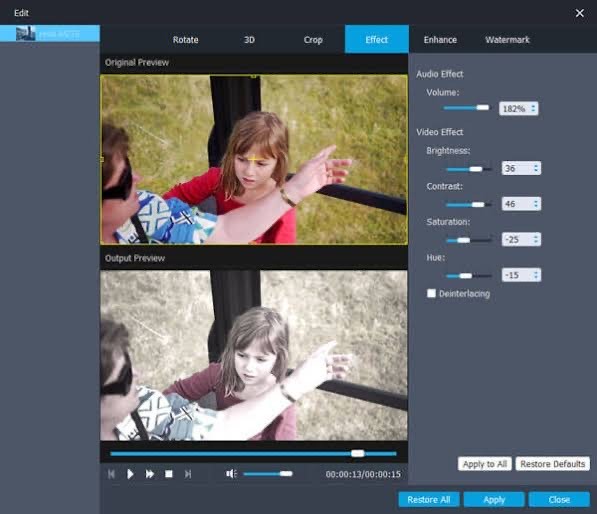
Step 3: Adjust the Image Settings
To improve the quality of the image, the next step is to adjust the image settings after the footage has been uploaded. This can incorporate changing the splendor, difference, and immersion levels of the picture to make it more clear and more characterized.
Step 4: Apply Filters
After adjusting the image settings, the next step is to apply blur and noise reduction filters. You can use a variety of filters and presets to improve the image with most video enhancer software.
Step 5: Export the Enhanced Image
At long last, once you have made the necessary adjustments and applied the filters, the last step is to export the enhanced image. Whether you’re printing or using the web, check that the file format and quality settings are appropriate.
Best Practices for Using Video Enhancer Software for Upgrading Pictures in Low-Light Conditions
- Utilize good footage that is reasonable for altering and upgrading.
- Make sure that the software you use is trustworthy and accurate.
- Carefully adjust the settings for the image to avoid over or underexposing it.
- Find the best presets and filters for your footage by experimenting with them.
- While working, take breaks to avoid eye strain and exhaustion.
In conclusion
Low-light image enhancement can be made possible with the help of video enhancer software. You can produce visually appealing and professional-looking images by carefully adjusting the image settings and applying filters to your footage. Use high-quality footage, dependable software, and a variety of settings and filters to find the ones that work best for you.
In industries like security, surveillance, and law enforcement, where it is essential to capture clear and detailed images even in low-light settings, video enhancer software can be especially useful. It can also be helpful for videographers and photographers who want to take stunning pictures in dark places.
Enhancing images in low-light conditions is no longer a challenge with the right video enhancer software. You can produce stunning photographs of high quality if you adhere to the guidelines outlined in this blog post and take the time to experiment with various settings and filters. Therefore, why not give it a shot and see how it affects your footage?